There’s a reason YouTube TV has found itself the leader in live-streaming video. In fact, it has about twice as many subscribers to its cable-TV replacement as the next biggest platform. And. among other reasons like price, reliability, and abundance of channels, it is just packed with features.
In fact, YouTube TV has so many features tucked away in there that you’ll be forgiven if you don’t spot them all at first. But we’ve done the legwork. We’ve watched hours and hours of YouTube TV. Weeks and months, really. We’ve flipped all the buttons. We’ve pressed all the switches. (Wait — reverse that.) And we’ve put together a list of what we think are the most important — if not always obvious — YouTube TV tips and tricks. And we’re not just talking about NFL Sunday Ticket.
This isn’t everything. There are still a few other places to explore in the settings menu, as well as when you’re watching shows and movies. But these are the YouTube TV tips and tricks we absolutely think you must know.
Record a show to watch later

YouTube TV lets you “record” as much as you want, which is great. What it’s lacking, however, is a visible record button.
Perfect for watching NFL, NBA, and more, you can score 50% off your first month of live TV with Sling TV.
Instead, just look for the plus button. As in the + symbol. You can hit it when you’re in the middle of watching something — if it’s live and you just tuned to it, you’ll get a recording from that point onward. If it’s something that YouTube TV knows is on more than once — say, The Shawshank Redemption or Young Sheldon — it’ll wait for the next time it’s on and save it from there.
You also can have it record all upcoming episodes of a show or sporting events. It’s super powerful, and also very intuitive. Once you know where that button is.
Use a custom channel list
This probably is the most powerful feature YouTube TV has to offer. The service has more than 100 linear channels. (Basically, “linear” means a channel that shows the same thing to everyone at the same time — the opposite of watching something “on-demand.”) But that leads to a pretty lengthy list of channels in the live tab.
But you can change that channel list. You can rearrange things as you see fit — and hide channels you know you’ll never want to watch.

You can customize things from a web browser or mobile device. (We’ll talk about what you can do from a TV in a second.) Go to the Live tab, and then look for the Sort button. Select it, and then look for the Custom option. There should be an Edit button next to that. Choose it.
Now, you can grab a channel to change its order — literally “grab” the two lines with your mouse pointer or finger and then drag the channel to where you want it. And if you don’t want to see a particular channel, tap or click the checkmark next to it to hide things.
While you can’t customize the list on your TV, you can change the live view from the default (which YouTube TV picks for you), the custom list, most viewed, or alphabetical. On a TV, look for the three lines above the first channel in the list. Click it, and you’ll see your options. (You also can do this on mobile devices and in a web browser from the sort menu.)
One fairly major warning, though: If you use a custom channel list, any new channels that YouTube TV adds will be hidden by default. That’s annoying and bad, and something you need to be aware of if you go this route. But other than that, having a custom list is the way to go.
Check out the streaming nerd specs

We’ll warn you that this one isn’t something you’ll want to have on for any real length of time. First is that it’s planted right in the middle of the screen, on top of whatever you’re watching. And second is that you probably won’t actually understand what you’re looking at, unless you’re way, way into what makes streaming video work.
But if you do want to know about things like buffer strength and live latency — more on that in a second — or what resolution what you’re watching is being served up in, this is a super cool way to see it.
This only works on a TV. While you’re watching something, press a directional button and look for the Three-dot menu button. Then look for Stats for Nerds. Select it, then toggle it on.
You’ll now see stats. For nerds.
Decrease the live delay

One of the biggest complaints about live-streaming services is the latency. While we are living in the future, it still takes a few extra seconds — OK, quite a few — to get all those bits and bytes from the source broadcast to whatever you’re watching on. Thirty seconds or more isn’t uncommon. And that can especially be a real drag during live sports, when the live feed may be well behind an app and its notifications.
YouTube TV has an answer for that. Or at least a feature that can lessen the lag. It only works on TV platforms (not the mobile apps), and you’ll want to make sure that you’ve got a good (i.e., fast) internet connection, because this means you’ll have less of the live event buffered. So if you have a network hiccup, the game or whatever may grind to a halt until the feed revives itself.
If you’re watching a live channel, press a button on the directional pad on your remote(up, down — whatever brings up all the on-screen option).) Then hit the Three-dot menu and look for Broadcast Delay. Choose Decreased and you’ll now be closer to actual live broadcast. But remember that you’ll have less of the stream in the buffer. So if things start hanging, you’ll want to flip it back.
Hide sports score spoilers

YouTube TV is serious about sports, and it makes it pretty easy to follow specific teams or leagues. It also will toss up scores and stats — sometimes when you might not want to see them, like when you’re trying to avoid spoilers, for whatever reason.
The good news is that it’s easy to hide scores — you just need to know where to find them. This is something you can do on a mobile device, on a TV, or in a web browser. The gist is that you’ll want to go to the home screen and choose the Sports category. (Look for the little pill-shaped buttons.)
Now scroll until you get to a specific team, or a specific league, and click into it. On the mobile app or in a web browser, you’ll hit the Three-dot menu, and then choose Hide all scores for this team/league. It’s basically the same on a TV — but look for the little Eyeball logo instead. Once you select the eye, it’ll expand to show the Hide all scores language.
Add a more kid-friendly filter

One of the more powerful features of YouTube TV is the ability to have separate profiles for different users. That’s great for keeping your kids’ shows from influencing your recommendations. (Or vice versa!) But those separate profiles require separate Google accounts, all tied to a head-of-household designated account.
But does your 3-year-old need a full Google account? Probably not. If you still want to make sure they can’t accidentally start watching, say, HBO on your Google TV profile, it’s time to set a filter.
You can do this from a TV, from a mobile device, or in a web browser. Go to the Settings, then look for Filter. You’ll see a toggle switch that’ll make things a little more kid-friendly.
It’s not all that granular — you’ll be limiting TV shows to TVZ-Y, TV-Y7, TV-Y7-FV, or TV-G. And movies will be limited to G and PG ratings. But it’s better than nothing. And having to explain … things.
Take control of your downloads

YouTube TV allows you to download shows to watch offline — if you also have the YouTube TV 4K Plus add-on, which costs $10 a month. If you’ve ponied up for this option, it’s worth having a look in the Downloads section of the settings.
You have a few options here. First is the ability to only download over Wi-Fi. That’s important if you have a data cap on your mobile plan (which is something kids — who tend to download things a lot — don’t usually consider).
You also have the ability to adjust the download quality. By default, it’s set to 720p on a phone, but you can increase that to 1080p, if you want. And my iPad defaults to 1080p, but you can ratchet that back to 720p (or lower) if you want.
And this also is where you’ll see how much storage you’ve used with downloads, and it’s easy to delete things from here.
Use the dark theme
There are two kinds of people in this world: those who use dark mode and those who are wrong. YouTube TV caters to both, which is understandable. But you want to be in the former camp.
YouTube TV doesn’t launch in dark mode by default. You’ll need to enable it. Head into the Settings, and look for Dark Theme. Then toggle the switch and bask in the darkness. You’ll need to do this separately on mobile devices and in a web browser.
Flip between channels

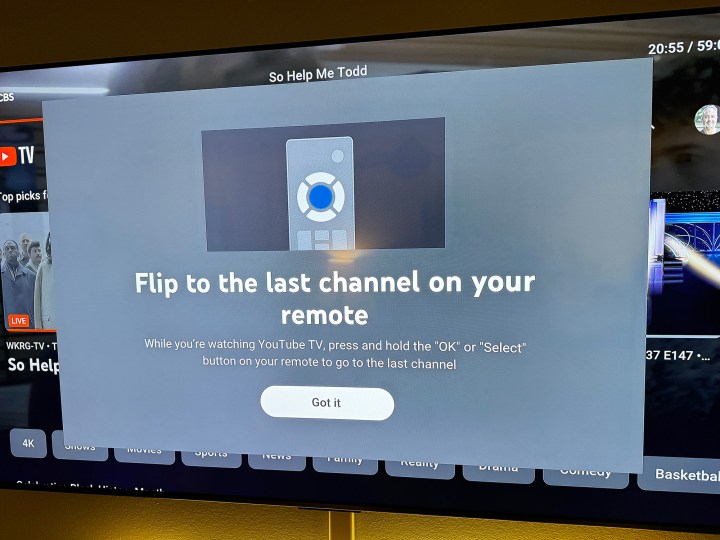
This is one of those features that sort of fell by the wayside when folks switched from cable and satellite to streaming, and we’re glad to see it back. While there’s no dedicated button for this on any of the streaming remotes (Roku comes close, but it’s not the same), you’re now able to flip between two channels on YouTube TV without having to first return to the live guide. It’s like having a dedicated “previous channel” button on the remote control.
Here’s how to do it: Start watching one channel. Then switch to a different channel. Now you can just hold down the OK or Select button on the remote control for whatever platform you’re using. You’ll then flip between the first and second channel.
And if you tune to a third channel, you’ll flip between it, and the most recent previous channel you were watching (and so on and so forth0.
If you’re a habitual channel-flipper, it’s a lifesaver.
Autoplay on start
YouTube TV automatically plays one of your top recommendations when you’re on the home screen. Maybe you like that. Or maybe it scares the living daylights out of you when you stumble into the living room at 4 a.m. on a Sunday morning and accidentally wake your entire family. (It, erm, happens.)
Here’s how to turn off that autoplay feature: Go into the Settings screen and choose Autoplay. Now toggle the Autoplay on Start option.
That’s it. Enjoy the silence.
Toggle surround sound

YouTube TV now attempts to serve up audio in 5.1 surround sound, whenever possible. The channel and show you’re watching will have to support it, of course. And you’ll need hardware that supports it, too.
But what if you don’t want to listen to everything in surround sound? Sometimes it just doesn’t quite work right. Weel, you can turn it off. Grab your remote and click on the Profile picture next to the search button to get into the menu options. Then head into the Settings screen. Now choose 5.1 Audio, and toggle the Surround Sound option.
This one only works on television setups, for the obvious reasons.
Editors’ Recommendations


